
Fun look at physical pen testing:
Turns out she didn’t need to do any breaking in at all.
She rode the elevator up to the reception floor without needing a security badge, found the office suite door propped open, walked past a security guard sitting at a desk and straight into a conference room.
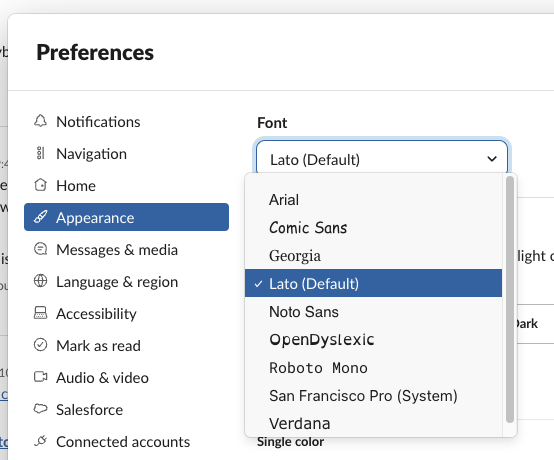
Slack now allows you to change the default font, which means I no longer need to look at the ridiculous ligatures Lato does for various letter combinations.
404 Media shines the light on VoteRef, a database of (most) registered voters in America along with their addresses, voting history and political affiliation. Terrifyingly easy to go from name to specifics.
The ranked choice voting rounds for the San Francisco mayoral election such a great representation of how it works. I love that you can feel empowered to vote for an unlikely candidate without “throwing” your vote away.
This is a confirmation that your Hulu subscription will be canceled
Baseball season truly is over. Got hit with one month of the latest Hulu rate hike to watch the World Series but my initial cost calculations proved pretty good. Will have to see what it’s like next season.
How Dormant Domains Can Be Weaponized During Events[…]:
CSC researched election-themed domain registrations from January 2023 to September 2024 and observed 59,000 unique domain names that were not owned by the candidates, political parties, or voting organizations.
Just in registration fees alone this feels absurd; to what end is this being done?
One of my favorite Guy Gavriel Kay novels is on sale today for $1.99, The Lions of al-Rassan. It’ll make you cry at the end.
botsin.space shutting down highlights one of the biggest weaknesses of the Fediverse: lack of true portability. That’s a lot of history that’s going to be lost, and probably scores of bots that won’t be updated to point to a new destination.
Ashes of Man (Sun Eater #5) by Christopher Ruocchio ★★★★☆: This series has not shied away from killing off major characters, to say the least, but off-screen at the end was a bit weak; the common failing with this series is the endings feeling like brief sudden pauses. Still captivating world-building action with solid forward momentum. Hard to believe I’m nearly caught up.
Beautiful ad campaign from Mullvad:
At Mullvad VPN, we have a very clear position on marketing. We have a strong policy against paying for reviews, a total ban on working with affiliate marketing, and we never pay influencers.
Pocket Casts has a cool unintended side effect of how it syncs to devices. As it replays my history of subscribing and unsubscribing the list of Podcasts temporarily flashes things I haven’t listened to in years and the various manual reordering I’ve done. Blast from the past.
Kingdoms of Death (Sun Eater #4) by Christopher Ruocchio ★★★★☆: I couldn’t stop. There’s something about the story line and the gradual reveals that makes me really captivated. This was a much harder book to read, probably owing to Hadrian’s experiences. I’m a little confused about the contrast between going down a path with no foresight past this point and earlier books narrator proclaiming some of the visions after this point had happened. I’m guessing it’s a continuity problem, a retcon, or something that’ll be settled in the books in the future. This one ended at a weird point and really did not feel like a conclusion: both unsatisfying and immediate.
The West Wing came out on Blu-ray on October 1st!
Demon in White (Sun Eater #3) by Christopher Ruocchio ★★★★☆: I’m appreciating more the time-skips and forward references but I’m still not entirely convinced it’s going to continue to work. I feel like the end of this book came quickly, predictably and uninterestingly. The plot overall was still fun, and the world-building definitely kicked up a notch. I’m not sure I’ll be reading the rest of the series, given I’m halfway through what’s released so far, but I think I’m happy to have read to this point too.
Howling Dark (Sun Eater #2) by Christopher Ruocchio ★★★★☆: The deus ex machina was a little much here, but also clearly not necessary from a plot perspective, so I can overlook it at least a little bit. I guess I can see how it paves the road ahead, but I am really stuck on it. I think the plot expansion was useful and enjoyable and I’m looking forward to the next book as we expand more into the Empire itself.
We want to inform you that some of the albums and tracks you purchased on Qobuz will no longer be available for re-download after October 1, 2024.
Like a dozen albums they’re just…removing? I really dislike digital “ownership.”
The Pariah starts a fun (completed) series by Anthony Ryan, and is on sale for $2.99.
Empire of Silence (Sun Eater #1) by Christopher Ruocchio ★★★★☆: There’s something interesting here, at least at the core. The world building is unique and I think can best be described as cribbing some good tropes and combining them together well. I feel like it’s probably 30% longer than needed, but at least reasonably unpredictable. The thing I dislike the most is the constant discussion of the long-future-from-this-novel state of the narrator. It’s good that it’s wrapping up loose ends (“and I never saw them again” after a chapter, e.g.) but it’s hard that it’s projecting some weird future state (look how awful I made the galaxy). I’m torn, really, but erring on the side of liking it more than I expected from the beginning.
Children of Earth and Sky by Guy Gavriel Kay ★★★★★: This was an interesting one. A lot of disconnected and reconnected plot lines that danced around each other but never quite melded. Still a solid Kay novel and really quite interesting to see the post-Sarantine world affairs
The Roku channel might be the most inconvenient “channel” to ever host baseball games. No tvOS app, no webOS app. And when you finally get playback working the audio is out of sync and the advertisements are terrible.